Techniques for Constructing Giant Ornaments

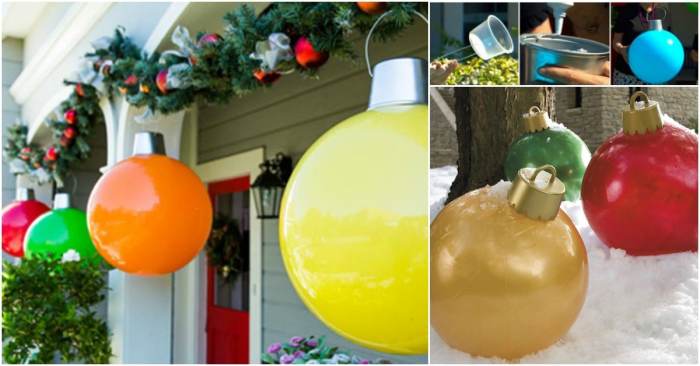
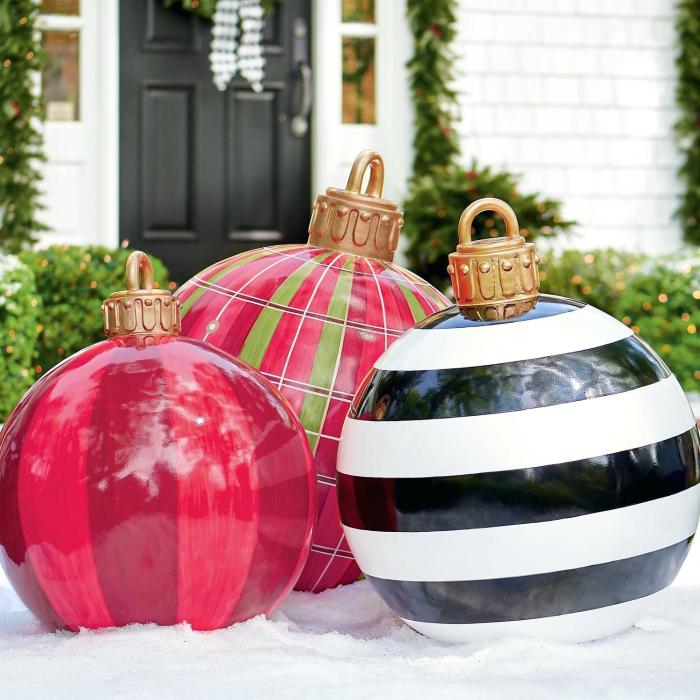
Diy giant christmas ornaments – Creating oversized Christmas ornaments is a fantastic way to inject unique, festive cheer into your home or community. The sheer scale of these projects allows for incredible creativity and the use of diverse materials. Let’s explore some exciting techniques for crafting these magnificent decorations.
Giant Paper Mâché Ornaments
Paper mâché offers a versatile and relatively inexpensive method for constructing large ornaments. The process begins with creating a sturdy armature, the foundational structure that will support the paper pulp. This could be a balloon inflated to the desired size, a wire frame shaped into a sphere or other festive form, or even a sturdy cardboard base sculpted into shape.
Once the armature is complete, strips of newspaper or other paper are dipped in a paste (typically made from flour and water or wallpaper paste) and carefully layered onto the armature. Multiple layers are necessary to achieve the desired thickness and strength. Allow each layer to dry completely before adding the next. Once dry, the ornament can be decorated with paint, glitter, fabric scraps, or other embellishments to create a truly unique design.
Consider adding a sturdy loop or hook for hanging before the final layer of paste is applied.
Giant Ornaments from Repurposed Wooden Pallets
Repurposing wooden pallets provides an eco-friendly and rustic approach to giant ornament construction. This method requires more advanced tools and skills, so safety precautions are paramount. Essential tools include a saw (circular saw or jigsaw), safety glasses, gloves, and a drill. Begin by carefully dismantling the pallet, ensuring all nails are removed to avoid injury. Individual slats can then be cut and shaped to form geometric shapes or free-form designs that are then assembled to create the desired ornament shape.
Strong wood glue and screws can be used to secure the pieces. Sanding is crucial to smooth out any rough edges before painting or staining. Remember to always wear safety glasses and gloves when using power tools. For extra stability, consider adding internal bracing within the structure.
Giant Fabric Ornaments versus Giant Foam Ornaments
Giant fabric ornaments and giant foam ornaments each offer distinct advantages and disadvantages. Fabric ornaments, often created using a sewing machine and various fabrics, allow for intricate designs and textures. They are lightweight and relatively easy to manipulate, making complex shapes achievable. However, they can be more time-consuming to construct and may require more advanced sewing skills. Foam ornaments, typically made using large sheets of foam, offer a quicker and simpler construction process.
Making giant DIY Christmas ornaments is a fun project! You can get really creative with the materials, and even incorporate some festive fabrics – maybe even leftover bits from your ugly christmas sweater DIY project! Think oversized pom-poms, repurposed sweater scraps, or even a whole bunch of tinsel for a truly dazzling effect. Once you’ve got your giant ornaments finished, they’ll be the star of your holiday decor.
The foam’s flexibility allows for easy shaping and carving, and it holds paint well. However, foam ornaments can be heavier than fabric ones, and the foam itself can be less durable over time, potentially tearing or becoming misshapen. Fabric ornaments offer greater design flexibility, while foam ornaments prioritize speed and ease of construction.
Decorating Giant DIY Christmas Ornaments

Transforming your giant DIY Christmas ornaments from blank canvases into breathtaking festive masterpieces is the most rewarding part of the process! This section will guide you through various decorating techniques, ensuring your creations become cherished family heirlooms for years to come. Let’s unleash your creativity and add some sparkle to the holiday season.
Decoupage on Giant Ornaments: A Step-by-Step Guide
Decoupage offers a delightful way to adorn your giant ornaments with intricate patterns and images. Begin by selecting high-quality, festive napkins, scrapbook paper, or even magazine clippings. Ensure the chosen images are scaled appropriately for your ornament’s size. Next, prepare your ornament surface by ensuring it’s clean, dry, and primed (if necessary, using a suitable primer for your chosen material).
Apply a thin layer of decoupage medium (mod podge works well) to a small section of the ornament’s surface. Carefully place your chosen image, smoothing out any air bubbles with a soft brush or sponge. Apply another layer of decoupage medium over the image, sealing it in place. Repeat this process until the entire ornament is covered, allowing each layer to dry completely before applying the next.
Finish with a final coat of decoupage medium to protect your artwork and add a beautiful sheen. For a truly unique touch, consider layering different images and patterns for a collage effect.
Painting Giant Wooden Ornaments: Techniques and Finishes
Painting a giant wooden ornament provides an excellent opportunity for showcasing your artistic talents. Start by sanding your wooden ornament smoothly to ensure a flawless finish. Apply a coat of wood primer to prepare the surface for paint, allowing it to dry thoroughly before beginning. For a rustic look, consider using chalk paint; for a more vibrant finish, opt for acrylic paints.
Experiment with different painting techniques: freehand designs, stencils, or even sponge painting can all create stunning effects. Remember to use multiple thin coats of paint rather than one thick coat to prevent drips and ensure even coverage. Once the paint is completely dry, seal your masterpiece with a clear varnish or sealant to protect it from scratches and moisture, extending its life and preserving its beauty.
Embellishment Options for Giant Ornaments, Diy giant christmas ornaments
A wide array of embellishments can elevate your giant ornaments to extraordinary levels of festive charm. Careful selection and thoughtful placement can truly transform your creations.
- Glitter: Add a touch of sparkle and magic by applying glitter glue or sprinkling loose glitter over areas of your ornament. Consider using different glitter colors and sizes for a more dynamic effect. For instance, a gradient of glitter from silver to gold can create a truly stunning visual effect.
- Ribbons: Ribbons of various widths, textures, and colors can be tied, wrapped, or glued onto your ornaments to add texture and visual interest. Consider using satin ribbons for a luxurious look, or burlap ribbons for a more rustic feel. A large bow at the top can add a classic touch.
- Beads: From tiny seed beads to large, chunky beads, these can add texture and sparkle. Consider using beads in coordinating colors to enhance your ornament’s design. Stringing beads onto wire and wrapping them around the ornament can create beautiful, three-dimensional patterns.
- Natural Elements: Incorporate natural elements like pinecones, sprigs of evergreen, berries, or dried flowers for a touch of organic beauty. Secure these elements with hot glue or floral wire, ensuring they are firmly attached. A combination of dried oranges and cinnamon sticks can create a beautifully aromatic ornament.
FAQ Summary: Diy Giant Christmas Ornaments
How long does it typically take to make a giant Christmas ornament?
The time required varies greatly depending on the size, complexity, and chosen materials. Simple designs might take a few hours, while more intricate projects could span several days.
Can I use outdoor-safe materials for ornaments displayed outside?
Yes, ensure all materials are weather-resistant. Consider using waterproof sealants for added protection against rain and snow.
What’s the best way to store giant ornaments after the holidays?
Store them in a cool, dry place, preferably in protective bags or boxes to prevent damage.
Are there any weight limitations for hanging giant ornaments?
Yes, consider the weight and choose sturdy hanging mechanisms like strong hooks and wires capable of supporting the ornament’s weight. Reinforce hanging points as needed.


